What is the Staging Environment?
The staging environment (also called the staging area) is like a buffer
zone where you gather your changes before committing them to your
repository.
It lets you decide exactly which files and edits should be included in
your next commit, giving you fine-grained control over your project’s
history.
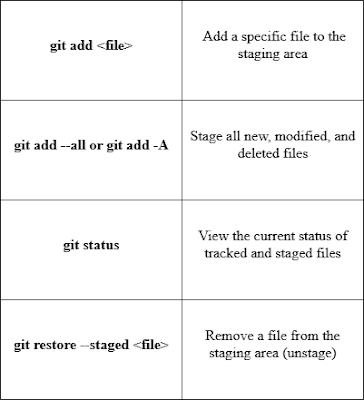
Here are some useful commands related to staging:
Stage a File with git add
To tell Git you want to include a file in your next commit, add it to
the staging area using:
git add index.html
This stages index.html. You can see what’s currently staged by
running:
git status
Example output:
On branch master
No commits yet
Changes to be committed:
(use "git restore --staged <file>..." to unstage)
new file: index.html
Stage Multiple Files with Git
To stage all changes in your project (including new files, modified
files, and deleted files) at once, you can use either of these
commands:
git add --all
or
git add -A
View Staged Files with git status
You can check which files are staged and ready to be committed using
the git status command.
Example:
git status
Output might look like this:
On branch master
No commits yet
Changes to be committed:
(use "git restore --staged <file>..." to unstage)
new file:
README.md
new file:
bluestyle.css
new file:
index.html
How to Unstage a File
If you accidentally added a file to the staging area, you can remove
it (unstage it) using:
git restore --staged index.html
This command takes index.html out of the staging area, so it
won’t be included in the next commit.
Alternatively, you can achieve the same result with:
git reset HEAD index.html
Troubleshooting
Accidentally staged the wrong file?
Use:
css
git restore --staged <file>
This will remove the file from the staging area.
Forgot to stage a file?
Simply add it before committing:
csharp
git add <file>
Not sure what’s staged?
Check the status of your files:
lua
git status
This shows what changes are staged and what’s still unstaged.
More topic in Git

